


Step 1: Planning and Design
1.1. Determine the Purpose and Size: Identify the purpose of your deck and the desired size. Consider factors such as seating areas, outdoor activities, and any specific features like built-in planters or benches.
1.2. Check Local Building Codes: Research and comply with local building codes and regulations. Obtain any necessary permits before starting construction.
1.3. Design the Layout: Sketch a rough layout of your deck, considering factors like sun exposure, access points, and any existing structures.

Step 2: Site Preparation
2.1. Mark the Deck Layout: Use stakes and string to mark the outer perimeter of the deck. Ensure the corners are square by measuring diagonally.
2.2. Excavate Footings: Dig post holes using a post hole digger. The depth and diameter of the holes will depend on local codes and the size of your deck. Pour concrete into each hole to create sturdy footings.

Step 3: Install the Ledger Board
3.1. Attach the Ledger Board: Secure a ledger board to the house using lag screws. Ensure it is level and properly flashed to prevent water damage.

Step 4: Build the Frame
4.1. Install Rim Joists: Connect rim joists to the ledger board, forming the outer frame of the deck.
4.2. Add Interior Joists: Install interior joists, spacing them according to local building codes and the chosen deck board material.

Step 5: Add Support
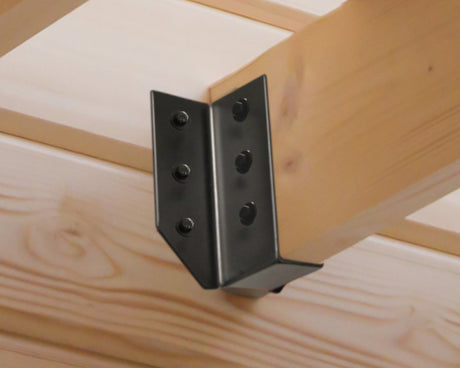
5.1. Use saddle brackets to add support to each side of the joists.
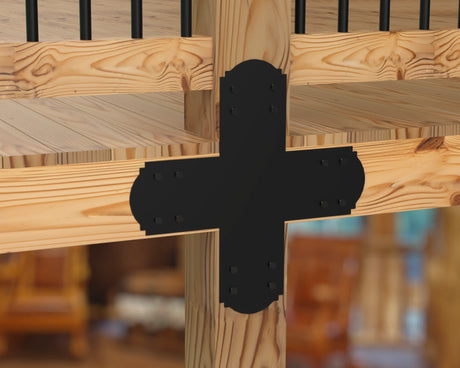
5.2. An optional addition of brackets is to use straight and T brackets to strengthen the framing.
5.3. Install smaller boards in the middle of the joists to bind them together. This will reduce the vibrations of footsteps once the build is complete.

Step 6: Install Decking
6.1. Lay Deck Boards: Begin laying deck boards perpendicular to the joists. Leave a small gap between boards to allow for drainage and expansion.

Step 7: Add Railing and Stairs
7.1. Install Posts: Secure railing posts using post anchors. Ensure they are plumb and at the correct height.
7.2. Attach Railing and Balusters: Install railing sections and balusters. Ensure they are secure and meet safety standards.
7.3. Add Stairs: If including stairs, build them to code, ensuring a comfortable rise and run.

Step 8: Finishing Touches
8.1. Seal and Stain: Apply a waterproofing sealant to protect the wood. Stain or paint the deck for added durability and aesthetics.
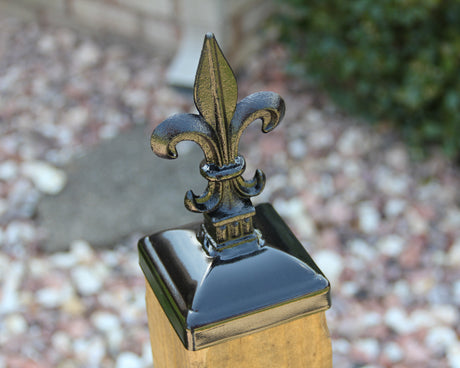
8.2. Install Post Caps: Add decorative post caps for a finished look.